

Sprint mechanics are the sequence of body positions and force applications that carry a runner from a dead stop to top speed and back down again. The single most important thing a beginner can learn is that speed isn't one skill; it's five phases stitched together, each demanding a different force direction and posture. Master the phase you're in right now, and the rest starts to click.
TL;DR:
- Beginners should prioritize mastering proper posture, arm action, and leg drive before attempting maximal effort sprints to prevent ingraining inefficient movement patterns.
- Focusing on incremental technique improvements and progressing from submaximal to near-maximal efforts over six to eight weeks enhances both speed development and injury prevention.
- Short, focused drills like wall drills, A-skips, and ankling effectively transfer to sprint mechanics when performed consistently and with proper form.
- Full recovery between reps and careful attention to ground contact and flight time indicate proper force direction shifts as speed increases.
- Proper warm-up routines and progressive loading are crucial in reducing injury risk, especially hamstring strains, for novice sprinters.
Table of Contents
- Sprint Mechanics Basics: The Five Phases That Build Speed
- Posture, Arm Action, Leg Action: The PAL Coaching Model
- Why Ground-Contact Direction Changes as You Speed Up
- Warm-Ups and Drills That Actually Transfer to Sprinting
- Fixing the Four Mistakes Almost Every Beginner Makes
- A Beginner Sprint Session You Can Repeat Weekly
- Coach Justin's Applied Sprint Protocols at REP Philosophy
- Breathing Technique During Sprinting
- Neuromuscular Coordination and Sprinting
- Basic Injury Prevention and Recovery for New Sprinters
- What Beginners Should Actually Prioritize First
- Ready to Put These Mechanics Into Practice
- Sources
- FAQ
Sprint Mechanics Basics: The Five Phases That Build Speed
Every sprint breaks down into distinct phases, and coaches lean on a shared framework to teach them: the start, acceleration, drive (or maximal velocity), recovery, and deceleration. Each one has its own mechanical job, and confusing them is where most beginner form problems start.
The start is a horizontal force problem. Whether you're coming out of blocks or a standing position, your first job is pushing back into the ground hard enough to launch forward, not up. The acceleration phase, typically the first 0 to 20 meters, keeps that forward lean going while gradually raising your torso. Pop up too early here and you kill your momentum before it builds.
By the time you hit maximal velocity, the job flips. Ground contacts get shorter, force shifts to vertical, and your posture goes fully upright. The recovery phase describes what your leg does between strides (the fast cycling of the foot back under the hip), and deceleration is the controlled slowdown at the end of a rep, which matters just as much for injury prevention as anything that happens at top speed.
Cues to watch for at each stage:
- Start: shoulders over hands or hips, powerful first steps, no immediate upright posture
- Acceleration: gradual torso rise over 20 to 50 meters, not a sudden pop-up
- Max velocity: tall posture, quick ground contacts, relaxed shoulders
- Deceleration: gradual reduction in stride length, not an abrupt stop
Posture, Arm Action, Leg Action: The PAL Coaching Model
Coaches commonly teach sprinting through a model called PAL: posture, arm action, leg action. It's a simple way to organize what would otherwise be an overwhelming list of technical details.
- Posture means a neutral spine with your head, shoulders, and hips stacked once you reach the upright phase. During acceleration, that stack tilts forward as a unit rather than folding at the waist.
- Arm action runs on roughly 90-degree elbow angles, driven from the shoulder rather than flapping from the elbow. Your hands should travel from hip pocket to cheek level, front to back, not across your body.
- Leg action covers knee drive, dorsiflexion (pulling your toes up toward your shin before contact), and landing under your center of mass rather than reaching out in front of you.
Reinforce each piece with a focused drill: wall drills for posture and knee drive, marching or skipping drills for dorsiflexion, and arm swings against a wall or in a seated position to isolate rhythm from your legs.
Pro Tip: Film yourself from the side at max velocity. If your foot lands well in front of your hip, you're overstriding, no matter how fast you feel.
Why Ground-Contact Direction Changes as You Speed Up
Force orientation is the physics underneath all the coaching cues above. Early in a sprint, force is directed mostly horizontally because your goal is to build speed. As you approach top speed, the demand shifts toward vertical force, since you're now fighting gravity and trying to minimize how long your foot stays on the ground.
Landing under your center of mass matters because contact points ahead of your hips create braking force. Every fraction of a second your foot spends absorbing forward momentum instead of redirecting it is speed you don't get back.
Two simple, observable measures tell you whether this is working:
- Ground contact time should shorten as you move from acceleration into max velocity.
- Flight time (the moment both feet are off the ground) should lengthen as your stride opens up at top speed.
Coaches watching from trackside don't need a force plate to spot this. A runner whose contacts stay long and heavy all the way through a sprint usually has an acceleration mechanic (reaching, pushing back) they never let go of, even once they should be tall and cycling fast.
Warm-Ups and Drills That Actually Transfer to Sprinting
Drills only help if they closely resemble the movement pattern they're meant to reinforce. Random stretching or generic cardio doesn't prepare your nervous system for sprint-specific demands the way targeted drill work does.
A solid warm-up structure runs in this order:
- Dynamic mobility (5 minutes): leg swings, walking lunges, hip openers.
- Activation (activation exercises such as glute bridges and banded lateral walks).
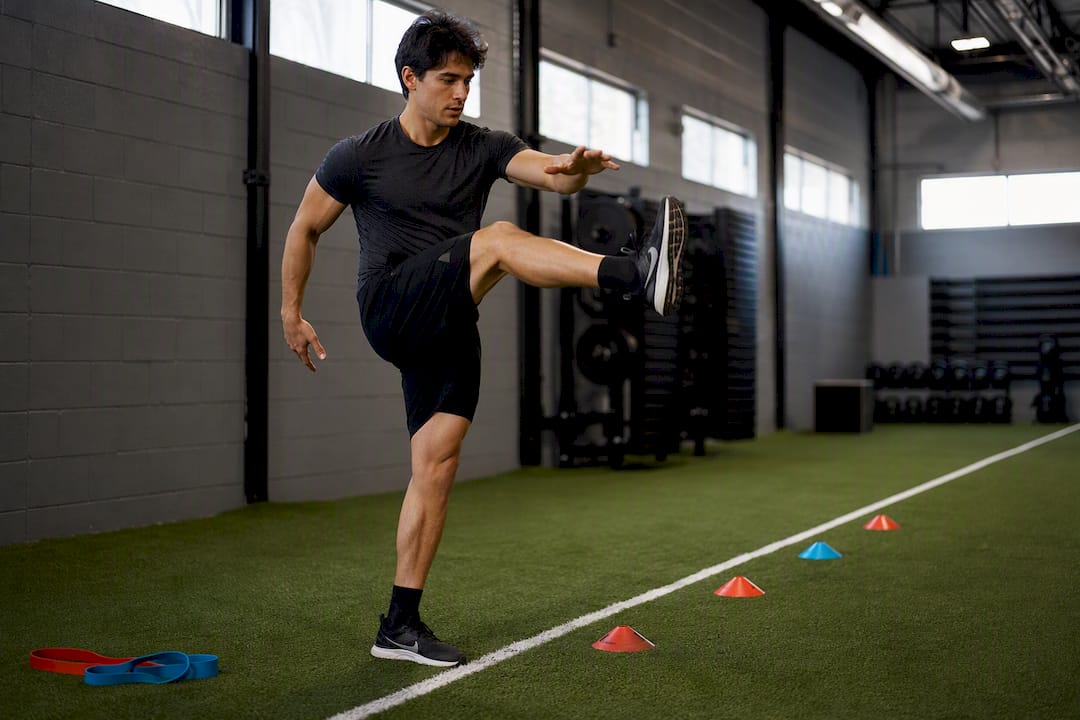
- Technical drills (8 to 10 minutes): wall drills for posture, A-skips for knee drive, B-skips for the recovery cycle, ankling for foot strike timing.
- Progressive sprints (60 to 100 meters, building from 60% to 90% effort).
Once you're comfortable with bodyweight drills, sled pulls reinforce horizontal force production for the start and early acceleration, while flying sprints (a running start into a timed segment) train max velocity mechanics without the fatigue of accelerating from a stop. Watch for common setup errors: heels dropping on ankling drills, knees drifting outward on A-skips, and shoulders creeping up toward the ears anywhere in the sequence.
Fixing the Four Mistakes Almost Every Beginner Makes
Most beginner sprint problems trace back to four issues, and each has a specific fix.
- Overstriding happens when you reach for extra distance instead of trusting your turnover. Wall drills and short build-up runs (20 to 30 meters, focusing on quick, close-to-the-body contacts) retrain the pattern.
- Low knee drive or poor hip height shows up as a shuffling stride. High-knee marching, then skipping, then resisted knee drives against a light band, rebuild the pattern progressively.
- Tense shoulders and choppy arm action waste energy that should go into your legs. Slow-motion arm swing drills and relaxed-jaw cueing (yes, an actual coaching cue) loosen this up fast.
- Heel-first landings from late dorsiflexion increase braking force and injury risk. Ankling drills done slowly, with exaggerated toe-up positioning, retrain the timing before you ever add speed.
Pro Tip: Fix one mechanical fault at a time. Trying to correct posture, arm swing, and foot strike all in the same session usually means none of them improve.
A Beginner Sprint Session You Can Repeat Weekly
A complete beginner session doesn't need to be complicated. Here's a template that works:
- Warm-up: 5 to 10 minutes of dynamic mobility and activation.
- Drill block: 10 to 15 minutes covering wall drills, A-skips, and ankling.
- Sprint reps: 4 to 6 reps of 20 to 50 meters at 80 to 95% effort, with full recovery (60 to 90 seconds per 10 meters sprinted) between reps.
- Cool-down: easy walking and light stretching.
Progressing over six to eight weeks generally means small, steady adjustments rather than big jumps:
- Weeks 1 to 2: focus entirely on technique at submaximal effort (70 to 80%).
- Weeks 3 to 5: raise intensity toward 90%, add one resisted sprint variation per week.
- Weeks 6 to 8: introduce flying sprints and slightly longer max-effort reps, keeping volume conservative.
Full recovery between maximal-effort reps protects both your mechanics and your hamstrings; rushing recovery is one of the fastest ways to reinforce sloppy form. Two sprint-focused sessions per week, with a day of rest or lighter activity between them, is a sustainable starting frequency for most beginners.
Coach Justin's Applied Sprint Protocols at REP Philosophy
Safety-first progression is an important principle guiding how sprint work is structured, especially with younger athletes. The Play Before Sprints protocol builds movement competency before adding speed or load, which lines up with what the research on drill transfer actually supports: master the pattern first, then chase velocity.
For athletes preparing for a season or a tryout, the 6 to 8 week conditioning plan shows how this progression looks in practice, and the youth speed drills library gives concrete examples of the same drills covered above, cued for a younger, less experienced audience. Certifications and specific client outcomes for Coach Justin's programs are detailed directly through REP Philosophy's coaching pages.
Breathing Technique During Sprinting
Breathing during a sprint isn't something most beginners think about, and that's mostly fine. A max-effort sprint under 10 seconds doesn't leave time for a deliberate breathing pattern the way distance running does. Your body will largely handle it on its own.
Where breathing does matter is in the moments around the sprint, not during it. A sharp exhale right at the start, timed with your first powerful push, helps brace your core and supports a stronger initial force output. Holding your breath through the entire rep, which plenty of beginners do without realizing it, spikes intrathoracic pressure and adds tension you don't want in your shoulders and neck.
Between reps, controlled breathing (in through the nose, out through the mouth, for 60 to 90 seconds) speeds recovery so your next rep isn't compromised by lingering fatigue. Gasping and shallow chest breathing between sprints is usually a sign you're not resting long enough before the next one. If you find yourself unable to catch your breath within that recovery window, that's useful feedback that your work-to-rest ratio needs adjusting, not something to push through.
Neuromuscular Coordination and Sprinting
Sprinting is less about muscle strength alone and more about how efficiently your nervous system fires those muscles in the right sequence, at the right time. This is why technical drills matter as much as raw conditioning for a beginner. Every rep of a wall drill or an A-skip is training your nervous system to recognize and reproduce a specific movement pattern, so it becomes automatic rather than something you have to consciously think through mid-sprint.
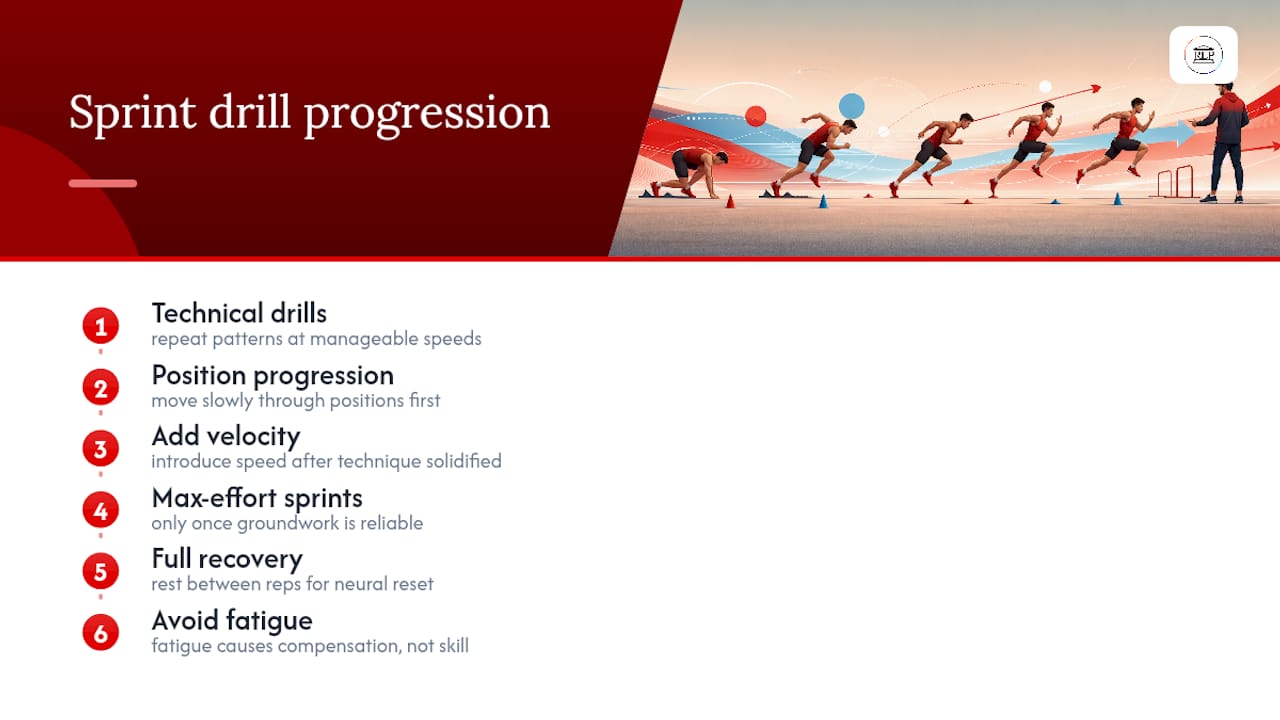
This coordination develops through repetition at manageable speeds before you ever try to sprint at full effort. That's why the drill progression in a beginner session moves slowly through positions before adding velocity. Rushing straight into max-effort sprints without that groundwork usually means your body defaults to whatever movement pattern feels natural, which is often the inefficient one you're trying to correct.
Fatigue is the enemy of neuromuscular precision. Once your form starts breaking down late in a session, you're no longer reinforcing good mechanics; you're practicing compensation patterns instead. That's part of why full recovery between maximal reps isn't just about your muscles recharging. It's about giving your nervous system a clean shot at repeating the correct pattern every single time.
Basic Injury Prevention and Recovery for New Sprinters
Sprinting puts a sudden, high demand on tissues that most beginners haven't trained specifically for, and hamstrings top the list of common injury sites. The best prevention starts before you ever sprint at full speed: a proper warm-up with dynamic mobility and activation work, not static stretching alone, prepares your muscles for the ballistic demands of sprinting.
Progressive loading matters just as much. Jumping straight to max-effort sprints in your first session, before your tissues have adapted to the specific stress of fast ground contacts, is one of the more common ways beginners get hurt. Building from 70 to 80% effort over your first couple of weeks, as outlined in the sample progression above, gives your body a chance to adapt.
Recovery between sessions deserves the same attention as the sprinting itself. Soft tissue work, adequate sleep, and spacing sprint sessions across the week rather than stacking them back to back all reduce your injury risk. For more detailed soft-tissue recovery strategies, including how to address tightness before it becomes a strain, dedicated recovery resources go deeper than a general sprint guide can.
If you ever feel a sharp, localized pain rather than general muscle fatigue during a sprint, stop the session. Pushing through that kind of pain is how a minor tweak becomes a multi-week setback.
What Beginners Should Actually Prioritize First
Most beginners want to know how to run faster right now, and I get it. But speed without sound mechanics just means you're sprinting toward a hamstring strain a little quicker than everyone else.
Master the movement patterns first: posture, arm action, leg action. Get a coach or even a phone camera to check your form before you start chasing max-effort reps, because errors ingrained early are far harder to unlearn than they were to prevent. Once your mechanics hold up under fatigue, the speed follows. That's the order that actually works.
— Coach Justin
Ready to Put These Mechanics Into Practice
Reading about posture, arm action, and leg action only gets you so far. What actually changes your sprint form is a coach watching your specific movement pattern and correcting it in real time, which is exactly what REP Philosophy builds every program around, for adults and young athletes alike.

If you're in the San Diego area, a personal training trial in 4S Ranch puts a coach's eyes directly on your sprint mechanics from session one, without committing to a long-term membership first. Parents looking for structured youth speed development can check out the WayALife Athletics sports performance programs, built around the same safety-first, competency-based progression covered above. Prefer to train on your own schedule? The on-demand virtual training library gives you custom programming and video coaching wherever you are. Browse the full range of options on the REP Philosophy coaching page and book the format that fits how you actually want to train.
Sources
- Sprinting Mechanics and Technique
- The training and development of elite sprint performance: an integration of scientific and best-practice literature
- 7 keys to proper running mechanics
FAQ
What Are the Basic Rules of Sprinting Form?
Good sprint form comes down to a forward lean during acceleration that gradually rises to tall posture, relaxed 90 degree arm swings from the shoulder, knee drive with dorsiflexion before ground contact, landing under your center of mass, and controlled deceleration at the end of a rep.
How Many 30-Second Sprints Should a Beginner Do?
True 30-second sprints are closer to middle-distance efforts than pure sprinting; most beginner sprint sessions instead use shorter reps of 20 to 50 meters, with 4 to 6 reps and full recovery between them.
Is a 20 MPH Sprint Speed Good?
Twenty miles per hour is a strong recreational sprint speed, well above average jogging pace, though elite sprinters reach considerably higher top speeds during max velocity phases.
How Should a Complete Beginner Start Sprinting?
Start with a proper warm-up, then focus on technical drills like wall drills and A-skips before adding any sprint reps, building intensity from 70 to 80% effort in your first couple of weeks rather than sprinting all out immediately.
What Is the PAL Model in Sprint Coaching?
PAL stands for posture, arm action, and leg action, a coaching framework used to break sprint technique into three manageable focus areas that programs like REP Philosophy build drill work around.