
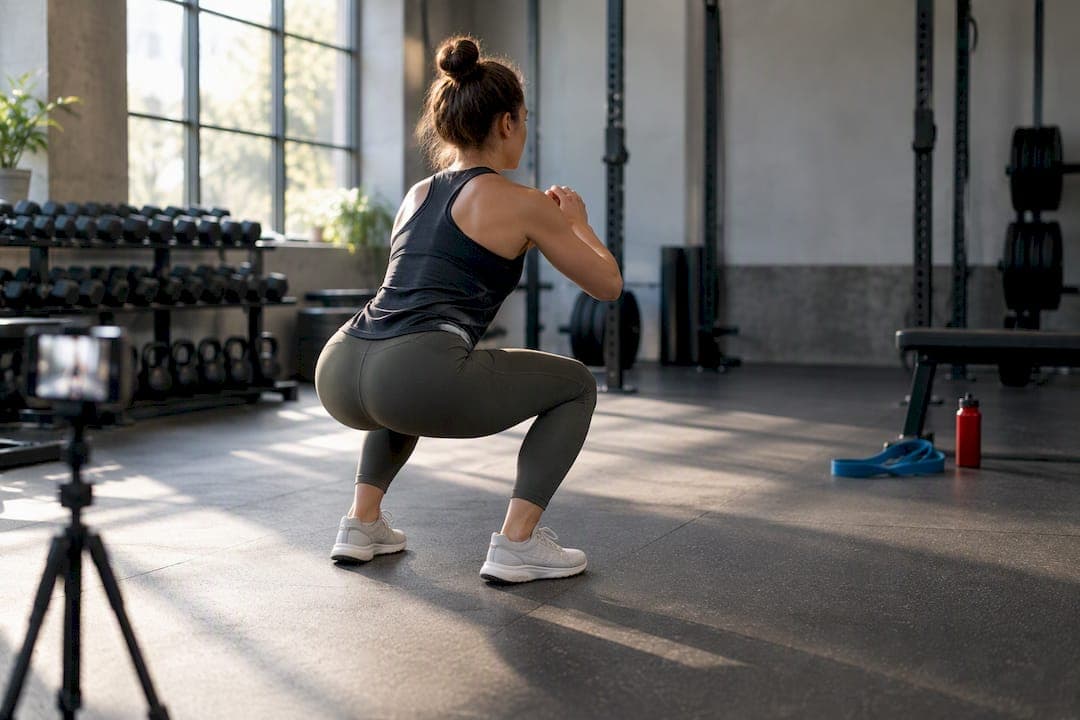
The single most important thing you can do is set your phone in landscape mode on something that doesn't move, frame your whole body plus whatever equipment you're using, and match your camera angle to what your coach needs to check. Run a five second test clip first to confirm the shot is clean. Then, when you send it, tell your coach exactly what exercise, set, and rep range they're looking at so they know precisely what to correct.
TL;DR:
- Filming in landscape mode with a steady camera on proper support ensures clear movement visibility, especially if the full body is in frame from setup to finish.
- Use a side angle for depth and joint angles, and a front or rear view for symmetry and foot tracking, filming both angles when possible for comprehensive analysis.
- Running a quick test clip before each set helps confirm framing, lighting, and stability, preventing the need for re-filming due to technical issues.
- Send full-set recordings with clear labels, including exercise, sets, reps, and load, to provide proper context that enhances coaching accuracy.
- Coaches review videos with frame-by-frame analysis and provide targeted corrections, preferring focused feedback on one or two key issues per session.
Table of Contents
- Prepare your space and gear: simple, safe, and coach-ready setup
- Which camera angle to use for common movements
- Fast pre-record checklist and test clip to run every session
- How to send clips and what context to give your coach
- What your coach will do with the video and how to get the most useful feedback
- Coach Justin's practical tips and the most common client mistakes
- How Rep Philosophy's virtual coaching and exercise library support form review
- Primary sources used for this guide
- Sources
- FAQ
Prepare your space and gear: simple, safe, and coach-ready setup
You don't need a film crew to get a video that's actually useful. You need a clear floor, a steady camera, and enough light to see what your joints are doing. Clear the area of stray dumbbells, bags, or pets before you hit record, and give yourself enough room that your hands, feet, and any bar or band stay in frame the entire time.

Shoot in landscape, always, and rest your phone on a tripod or something that won't wobble mid-set. According to Western University's practical video-evaluation guidance, professional-quality videography isn't the goal here: clarity of movement and sound is what actually helps a coach. Camera height should sit around mid-hip to chest level depending on the lift, since that's usually where the most telling joint angles happen.
A few small things make a bigger difference than people expect:
- Wear clothing that contrasts with your background so your joints and limbs are easy to track.
- Keep the space behind you plain and well lit rather than cluttered or shadowed.
- Check your battery and storage before you start so a dead phone doesn't cut your set short.
- If you're filming a minor, get a parent or guardian's permission first and keep the frame free of addresses, school logos, or other kids who didn't sign up to be on camera.
Pro Tip: Natural daylight from a window in front of you beats almost any indoor lighting setup, and it costs nothing.
Which camera angle to use for common movements
The angle you choose determines what your coach can and can't see, so pick it based on the correction you're actually chasing. A side view, straight on to your sagittal plane, is what shows squat depth, trunk lean, and hip or knee flexion angles clearly. That's your default for squats, deadlifts, lunges, and most hinge patterns.
A front or rear view tells a different story: left-right symmetry, knee valgus (knees caving in), foot tracking, and hip shift. If your coach is worried about one side collapsing more than the other, side footage won't show it no matter how sharp the video is.
- Use a side angle for depth, trunk position, and hip or knee flexion.
- Use a front or rear angle for symmetry, knee tracking, and hip shift.
- Film two angles, either as separate clips or two runs of the set, when one view can't capture everything your coach needs.
- Keep the camera far enough back that your full range of motion stays in frame at every point of the rep.
A camera-angle study on squat mechanics found statistically significant differences in how well reviewers detected compensatory movements depending on shooting direction, according to research comparing camera angles in squat analysis. In plain terms: the wrong angle can hide the exact fault your coach is trying to fix, so when in doubt, send both.
Fast pre-record checklist and test clip to run every session
Before your working set, run a quick test. It takes fifteen seconds and saves you from re-filming a set you can't get back.
- Record a five to ten second test clip and check that your full body is in frame from setup to finish.
- Play it back and confirm the audio is clear enough to hear cues or breathing.
- Confirm the camera is on a stable support, not propped against something that might shift.
- Check that lighting shows your joints clearly and the frame rate looks smooth, not choppy.
- Once the test looks right, record the entire set from start to finish, not just your best rep.
Sending only your cleanest rep hides the parts your coach most needs to see: how you set up, and how your form holds or breaks down as you fatigue. If you're filming something fast, like a jump or an Olympic lift variation, and your phone supports slow motion or a higher frame rate, use it and mention that in your message.
Pro Tip: Label your clips the moment you stop recording (exercise, set number, load, angle) so you're not guessing what "IMG_4471" was three days later.
How to send clips and what context to give your coach
A great video with no context is only half useful. Coaches move faster and give sharper feedback when they know exactly what they're looking at.
- Save and send video as MP4 when possible, since it plays reliably across most devices and platforms.
- In your message, include the exercise name, sets and reps, the load or variation, which angle you filmed, and the one or two things you'd like checked.
- If you're uploading through a cloud link or coaching platform, double check the sharing permissions so your coach can actually open it.
- When sending multiple angles or a warm-up compared to a working set, label each clip clearly so nothing gets mixed up.
According to NSCA guidance on movement analysis and video feedback, coaches rely on this kind of context, paired with pause and slow-motion review, to catch details a quick glance would miss. The more specific your note, the faster and more useful the feedback.
What your coach will do with the video and how to get the most useful feedback
Once your clip lands, your coach isn't just hitting play once and moving on. Pausing, slowing footage down, scrubbing frame by frame, and sometimes lining up two clips side by side are standard tools for catching the small compensations that move too fast to see at full speed. A systematic review on video-based visual feedback found that this kind of replay, paired with verbal coaching cues, tends to improve motor learning across multiple studies, though it works best as a companion to coaching rather than a replacement for it.
You can speed this whole process up on your end:
- Ask your coach for just one or two priority corrections instead of a full rundown of everything.
- Request a specific drill or cue you can practice between sessions.
- Ask which angle to film next if your coach wants a second view.
Pro Tip: Give your coach a day or two to review before following up, and when you resend a clip, keep it focused on the exact cue you were given.
Coach Justin's practical tips and the most common client mistakes

I've watched hundreds of client clips come in over the years, and the same three mistakes show up again and again. Filming too close so feet or hands get cut off. Handheld footage that shakes right at the bottom of a squat, which is exactly when I need to see the most. And clips that start mid-rep or cut off before the set actually ends, which hides the fatigue patterns that matter most.
Fix all three with the setup above: tripod, full body in frame, record from the first rep to the last. If you're a virtual client preparing for your first review, send me a test clip along with the exercise name and what feels off, and we'll spend our first session correcting form instead of your camera work.
— Coach Justin
How Rep Philosophy's virtual coaching and exercise library support form review
If you want feedback that goes beyond a single clip, Virtual Coaching Sessions at Rep Philosophy give you a coach reviewing your video, adjusting your programming, and following up as your form changes week to week. Pair that with the Exercise Video Library Membership, priced at $12.50 per month, and you have a reference library to compare your own footage against while you build better habits.
On your first submission, send:
- A short test clip confirming framing, lighting, and stability.
- The exercise name, sets, reps, and load or variation.
- The specific angle you filmed and what you'd like checked first.
That context lets your coach prioritize the correction that matters most right away. Ready to get a coach's eyes on your form? Book a session or explore membership options and send your first clip this week.
Primary sources used for this guide
- Western University's video-evaluation guidance on tripod use, framing, and test clips.
- MDPI research comparing video analysis to computerized limb-position detection on smartphone recording accuracy.
- MDPI camera-angle studies on squat analysis on how shooting direction affects fault detection.
- NSCA guidance on movement analysis and video feedback on coach review practices.
- Springer systematic review on video-based visual feedback on motor learning outcomes.
- ClickCoach coaching progress tracking software for how coaches log and revisit client video over time.
Sources
- Western University practical video-evaluation guidance
- Comparing video analysis to computerized detection of limb position (MDPI)
- MDPI studies on camera angle and squat analysis
- NSCA guidance on movement analysis and video feedback
- Systematic review on video-based visual feedback (Springer)
FAQ
What's the best camera angle to record workout form?
It depends on what your coach is checking: a side view shows depth, trunk position, and hip or knee angles, while a front or rear view shows symmetry and knee tracking. When you're not sure, film both angles so nothing gets missed.
Do I need a tripod to record my exercise form?
You don't need an expensive one, but you do need something stable. According to Western University's guidance, an immobile support matters more than camera quality, since shaky footage hides the exact moments a coach needs to see clearly.
Should I send my best rep or the whole set?
Send the entire set from setup to the last rep, not just your cleanest one. The start shows your setup and the end often reveals fatigue-related changes, both of which give your coach useful information.
How do I record my child's workout for a coach safely?
Get permission from a parent or guardian before filming, and keep the frame free of other kids, addresses, or school logos. Coaching-assessment guidance from SportStructures treats this kind of consent as a basic requirement whenever minors are being filmed.
What information should I send along with my video?
Include the exercise name, sets and reps, the load or variation, the camera angle you used, and one or two specific things you want checked. This context, paired with NSCA's guidance on video review, helps your coach give faster, more targeted feedback.